Using OpenCV 3 on Qt Creator 3.2 (Qt 5.3)
02 Nov 2014
Qt is a “cross-plataform application and UI framework” that is being used for 800,000+ users. In this post we’re going to learn how to use OpenCV 3 on Qt 5.3 projects, so that you can create your applications with great UI features easier. If you remain with any doubt after reading this post, watch the video.
Pre-requirements:
- Ubuntu 14.04
- OpenCV 3 installed: How to install OpenCV 3 on Ubuntu
This post has been translated to ‘farsi’ (persian) language by Ali (thanks!).
Getting ready
Before we start, I need to say I’m assuming you already have OpenCV 3 installed on your Ubuntu. If this isn’t your case, check the tutorial in the pre-requirements note. Even if you have, pay attention to this fact: OpenCV must have been compiled without WITH_QT=ON, because this flag enables OpenCV with Qt 4, not Qt 5.x, as we want here.
I know you’d like to see screenshots along this post, right? You won’t. Instead, I prefer to make videos so you can see the whole process. I hope you enjoy.
Downloading and installing Qt 5.3 and Qt Creator 3.2 Qt gives us a lot of options to download its framework and we’re going to use what’s recommended: Qt Online Installer for Linux.
- Visit Qt Website and go to Download;
- Choose Community, if you have “projects compliant with GPL/LGPL”;
- Click Download Now or choose what’s best for you;
- Recommended download (in my case): Qt Online Installer for Linux;
- Run the installer;
- Done! We, now, have Qt 5.3 and Qt Creator 3.2 installed.
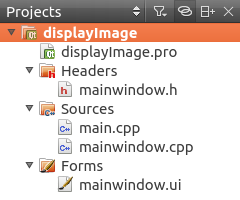
Creating a Project on Qt Creator 3.2
- File » ‘New File or Project’ (or Ctrl+N);
- Choose ‘Applications’ under Projects and select ‘Qt Widgets Application’ and press ‘Choose…’;
- Give a name to your project, browse to where you want it inside and click ‘Next’;
- Expand the options clicking on Desktop Details and uncheck Debug (personal choice). Click on ‘Next’;
- You can leave the rest as default, so go ‘Next’ » ‘Next’ » ‘Finish’ and we’re done!
Linking OpenCV to our projects – Qt Creator 3.2 (Qt 5.3)
First of all, go to your “.pro” file and add the following lines before “SOURCES”:
INCLUDEPATH += /usr/local/include/opencv
LIBS += -L/usr/local/lib -lopencv_core -lopencv_imgcodecs -lopencv_highgui
Remember to add all the libraries you’re going to need in your project. I’ve added only these three (core, imgcodecs and highgui), because we’re going to build a very basic sample. After that, you’re ready to use OpenCV in your project.
Building and running a sample
The program we’re going to use is very simple: you’ll need to hard-code the filepath to an image so that cv::imread() can read it and the image will be displayed by cv::imshow(). This way we can proof that OpenCV is running on Qt Creator.
Add the following lines after ui->setupUi(this) in the file Sources/mainwindow.cpp:
Make sure your PATH_TO_IMAGE is valid. A lot of users were experiencing errors due to invalid paths. If your program runs and nothing happens, your image path is wrong.
cv::Mat inputImage = cv::imread("{PATH_TO_IMAGE}");
if(!inputImage.empty()) cv::imshow("Display Image", inputImage);
Don’t forget to add #include <opencv2/opencv.hpp> on the header.
Build the project (Build » Build Project or Ctrl+B) and run it (Build » Run or Ctrl+R).
Any doubts? Watch the video below:
The image used on the video was created by Razaras.
If you still have doubts or you’re facing any problem, send me an email: me [at] rodrigoberriel.com. Don’t forget to leave your comment.